14 minutes
I wanna learn C++, computers and reverse engineering part 2
This post has been superseded by “Hacking Videogames For Fun”
Introduction
So from part 1 we learned a lot about games, how they work, how they are hacked etc. I couldn’t figure out how to hack Satisfactory.
A lot of time passed since I first wrote my posts. I have been busy with school and such, so I have either been to tired to write, there hasn’t been anythign to write about or there wasn’t any time.
Last time we wrote an external cheat for counterstrike. I have been studying the GuidedHacking forums some more and read up on internal cheats and ddl injections. It’s a topic I have kinda avoided earlier since I wanted to get an external going first. Apparently an internal has many huge features that externals doesn’t have like better performance, harder to detect by anti-cheat (if done propper) and you are closer to the process so you can rewrite the actual code of the game/program. Rake from the guidedhacking forums had this to say: ` Internal vs. External?
External External Hacks use WriteProcessMemory(WPM) and ReadProcessMemory(RPM) to interact with the game process’s memory. To do this you need to ask the kernel to give you a handle to the process by using OpenProcess() with the Process Access Rights you require, typically PROCESS_ALL_ACCESS. The handle is a required parameter for RPM/WPM. Kernel mode anticheats can easily block external hacks by using ObjRegisterCallbacks to block handle creation. Info from DouggemHacks. RPM/WPM is slow because you have the overhead of the API calls into the kernel. You should limit the frequency of these calls and store as much information locally as possible to increase the performance of your external hack. If the game has no method of detecting RPM making an overlay ESP is a good way of making an undetected external ESP because you only need RPM to be undetected.
Pros of external:
- In my opinion none compared to internal unless you just want to super quickly patch some bytes and then close the hack
Cons of external:
- Super easy to detect because of the open process handle
- Harder to use especially for beginners (WPM/RPM, getting the PID, blalba) though easy to master because it has no potential
- Less potential
- Slow
Internal
Internal hacks are created by injecting DLLs into the game process, when you do this you have direct access to the process’s memory which means fast performance and simplicity. Injected DLL’s can be made more sneaky by using different injection methods such as Manual Mapping. View the GuidedHacking Injector thread for more info Try a simple DLL hack source code for Assault Cube for learning purposes. When you are internal you create pointers to objects, typecast them and point them to objects in memory. Then you can access variables of that object easily through the pointer. ReClass is a great tool for generating classes from memory. This is an example of how to typecast variables in memory and modify them in an internal cheat:
DWORD* localPlayerAddress = (DWORD*)(0x509B74);
int * health = (int*)(*localPlayerAddress + 0xf8);
*health = 1337;
Pros of internal:
- Sick performance
- Easy to start off with
- Much potential
- Can be super sneaky and almost impossible to detect if done properly
Cons of internal:
- Hard to master
- Easier to detect when you don’t know what you’re doing `
I have to get on this internal stuff!
Rewriting my CS:GO cheats for Internal
So first thing I did was taking the counterstrike cheat that was already made and make it internal. The process of doing this was easy since everything was kinda already made. Since the game will be injected and running as a thread on the actual process itself, there is no longer need for any read or write process memory. We can just directly set it like it was a variable.
void bunnyHop()
{
  vars.flag = memClass.readMem<BYTE>(vars.localPlayer + offsets.flags);
  if (GetAsyncKeyState(VK_SPACE) && vars.flag & (1 << 0))
  {
    memClass.writeMem<uintptr_t>(vars.gameModule + offsets.fJump, 6);
    Sleep(1);
  }
}
So instead of doing it like that, we do it like this:
void bunnyHop()
{
	vars.flag = *(BYTE*)(vars.localPlayer + offsets.flags);
	if (GetAsyncKeyState(VK_SPACE) && vars.flag & (1 << 0))
	{
		*(uintptr_t*)(vars.gameModule + offsets.fJump) = 6;
	}
}
Much simpler right?
Ok good, now how do we inject it?
I looked into it and injection uses mainly the VritualAllocEx(), WriteProcessMemory() and CreateRemoteThread(), more info here. The site does a very good job at explaining how everything works, so I don’t have to. At this point I’m gonna use guidedhackings injection tool to inject my ddls, but I want at some point later wanna make my own that also does it automatically so I don’t have to do it manually every time.
Lets do Skyrim!
So for this next segment I’m gonna follow Icew0lfs walkthrough of his making of Skyrim. He introduces us to a loot of amazing tools for gamehacking and ways to reverse engineer. Tools like ReClass.net, x64dbg etc. Very nice! I wanted to avoid copy pasting, so I will be trying my luck on Skyrim Special Edition and not the original skyrim game. The Special Edition is 64-bit while the old one is only 32-bit. This will make some changes to our code and I therefor have to actually think while following. You can think of this much like doing math tasks. Same method different numbers xD.
So first wanna find an entity list. I first tried to do this using multilevel pointers to a pointer list that points to the entities. I’m not yet pro with cheat engine, so there is an easier way to get the entities. Functions such as position, damage, etc. are often shared between all entities including the player entity like they were in Satisfactory. What I mean is that you pass the “actor” (who is gonna move) to the function, how much etc. What’s important here is who. So we can find one of these functions and see who accesses them. A function such as damage would be useless here since it would probably only be accessed when and if something takes damage. A position function would probably be accessed a lot more often. It might be accessed every time something moves or even every game tick.
Shared instruction for X, Y and Z position in Skyrim.
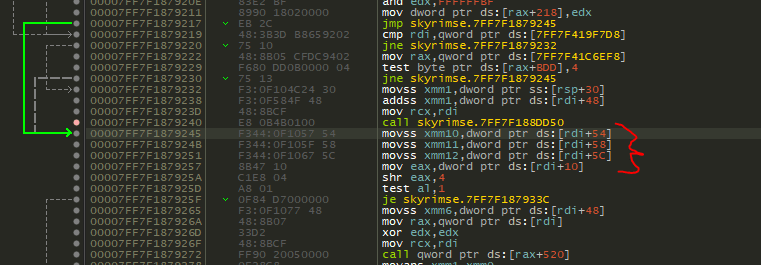
Hooks
A game hook is when you rewrite the games code at some point to jump to your code snippet then jump back and continue the code flow. This means that we can make a game function do something different, e.g., when we take damage in a game the code might look something like this; playerHealth - damage. If we place our hook here and jump to our code, we can make the code do something like this; playerHealth + damage. If we do this we heal everytime we take damage. (GuidedHacking, How to Hook Functions - Code Detouring Guide).
If we combine these hooks with our knowledge about shared instructions, we can use these hooks to grab entity addresses on the fly and add them to an “entity array”. When initially doing this I was struggling for about 5 months. When you hook in a game, you overwrite the code with a jmp to your hook and execute your own code. Since you are doing your own stuff, you will mess with the register values and they will change once you jump back. This will lead to unpredictable behavior, but most often crashing. To avoid this I push all the register values onto the stack and pop them off again once I’m done with my code and ready to return to the games code. Usually a hook will then look something like;
__declspec(naked) void entHook()
{
  __asm {
  // original bytes we overwrote from the game, aka stolen bytes
  movss xmm10, [rdi + 0x54]
  movss xmm11, [rdi + 0x58]
  movss xmm12, [rdi + 0x5c]
}
  __asm {
		push rax
		push rbx
		push rcx
		push rdx
		push rbp
		push rdi
		push rsi
		push r8
		push r9
		push r10
		push r11
		push r12
		push r13
		push r14
		push r15
	}

  // Our things

  __asm {
  pop r15
  pop r14
  pop r13
  pop r12
  pop r11
  pop r10
  pop r9
  pop r8
  pop rsi
  pop rdi
  pop rbp
  pop rdx
  pop rcx
  pop rbx
  pop rax
  jmp[jumpBack] // Jump back to our gamecode + the bytes we stole.
  }
}
Since we are overwriting gamecode with our own, we still also need to make sure that what we replaced also gets executed somewhere. Therefor we add these to the start of our hook. We also need to jump back to our gamecode. If we jump back to exactly where we jumped off from, we will be stuck in an infinite loop of jumping to our code and jumping back to our jump. Therefor we add the size of how many bytes stolen to the address of where we jumped from and jump there.
The x64 issue.
Inline assembly gives us the option to write assembly code in our c++ programs. This is important because it gives us control over how the code will look like after compile and it also gives access to registers. The problem with x64 inline assembly is that it has been deprecated for x64 and no longer supported. On microsofts website it says; Inline assembly is not supported on the ARM and x64 processors. The following topics explain how to use the Visual C/C++ inline assembler with x86 processors. My problem then was how to emulate inline assembly using e.g., bytecode and similar. I also needed access to the registers to save those register values to my array, but I couldn’t figure this out. After looking around I found out that swapping compilers could work. I first tried LLVM, but with LLVM clean assembly functions are required. I cannot mix c++ code and assembly here. After looking further I got a tip to use ICC (Intel C++ Compiler) which has the option to do regular inline assembly. I made a post about it on Guided hacking which could be interesting to check out.
Now that this problem was solved, it’s time to finish my hook. This is what I came up with;
std::vector<playerEnt*> entities;
playerEnt* entsptr;
uintptr_t jmpBackAddyEntityList = 0x0;

__declspec(naked) void entHook()
{
	if (entities.size() < 1)
	{
		entities.resize(256, nullptr);
	}
  __asm {
		mov[entsptr], rdi
		movss xmm10, [rdi + 0x54]
		movss xmm11, [rdi + 0x58]
		movss xmm12, [rdi + 0x5c]
	}
  __asm {
  push rax; save current rax
  push rbx; save current rbx
  ...
  push r14; save current r14
  push r15; save current r15
}

  bool alreadyThere = false;

  if (entsptr == nullptr || localPlayer == nullptr)
  {
    goto GIVE_UP;
  }

  distEnt = findDistance(localPlayer->xyz, entsptr->xyz);
  distEnt = distEnt / 100;
  if (distEnt > 160.0f || distEnt < 0.1f)
  {
    goto GIVE_UP;
  }

  for (int i = 0; i < entities.size(); i++)
  {
    if (entities.at(i) == entsptr)
    {
      alreadyThere = true;
      break;
    }
  }

  if (alreadyThere)
  {
    goto GIVE_UP;
  }
  else
  {
    for (int i = 0; i < entities.size(); i++)
    {
      if (entities.at(i) == nullptr)
      {
        entities.at(i) = entsptr; // insert
        break;
      }
    }
  }

  GIVE_UP:
	__asm {
		pop r15; restore current r15
		pop r14; restore current r14
    ...
		pop rax; restore current rax
		jmp[jmpBackAddyEntityList]
	}
}
First I’m making my array where the entities will be stored. If the array is uninitialized, I resize it to 256 entities. I did this because if not I was crashing due to trying to write to null… Next I save my entity to a variable and execute the original game code. Save my registers. Check that the entity that I got is not a nullptr (and that I exist. I need to check this because I’m using this later.). If nullptr I jump to GIVE_UP, restore the registers and jump back. The findDistance function checks the distance between me the player and the entity. There is no reason load entities that are super far away. The for loop checks if the entity is already in the array. If it is I give up. Next part just adds the entity into the array.
Now hooking with our hook we can get an entitylist.

The entities
Now that we have the entities, we can then reverse engineer the structure of the entities. Looking at the code earlier movss xmm10, [rdi + 0x54]. We can see that we have rdi + 0x54. Here rdi is the base of the entity going through this instruction and 0x54 is the offset from the base to whatever the instruction wants to update. In this case it’s the X axis. If we set a breakpoint on this instruction we can look at the rdi value and put it into e.g., REClassNET. Using REClass we can dissect the structure and then automatically generate code from this data.
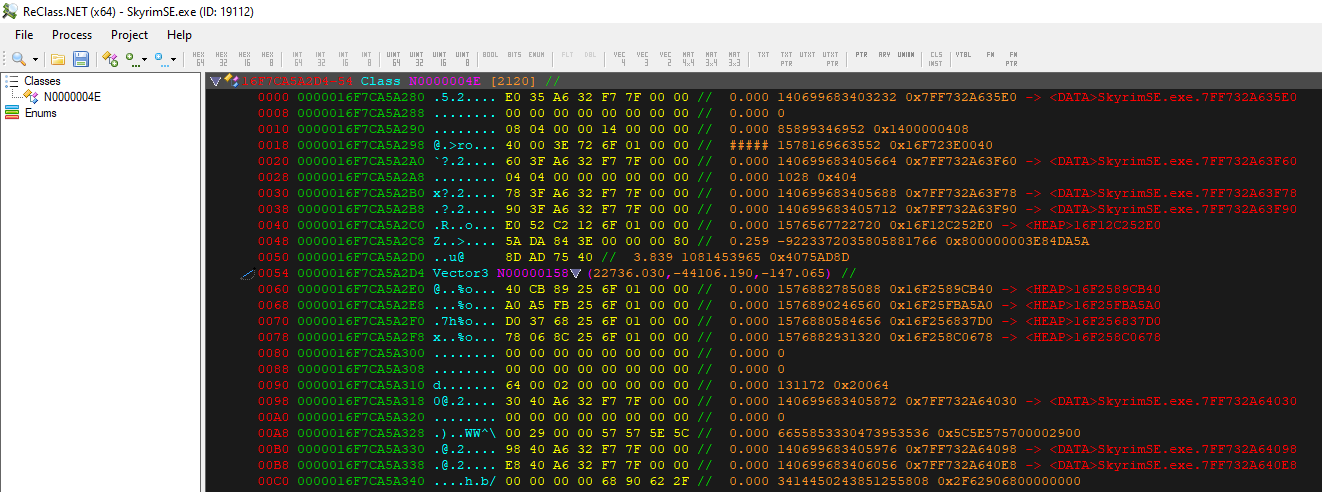
Generating code from REclass I end up with something like;
class playerEnt
{
public:
	char pad_0000[84]; //0x0000
	vec3 xyz; //0x0054
	class locationPtrClass* locationPtr; //0x0060
	void* validationPtr1; //0x0068
	void* validationPtr2; //0x0070
	void* validationPtr3; //0x0078
	char pad_0080[368]; //0x0080
	class namePtrClass* namePtr; //0x01F0
};
class locationPtrClass
{
public:
	char pad_0000[40]; //0x0000
	char* location; //0x0028
	char pad_0030[24]; //0x0030
}; //Size: 0x0048

class namePtrClass
{
public:
	char pad_0000[40]; //0x0000
	char* name; //0x0028
	char pad_0030[24]; //0x0030
}; //Size: 0x0048
I now wanted to try to make an ESP or wallhack with this information. We have the entities, their positions, their names etc and their named location (e.g., “Riften”). To make an ESP I need something to draw on. When we made one for CS:GO we used ingame functions to make our entities glow through walls. I don’t know off any game functions that I can use for skyrim to draw them, so I gotta use my own. There are multiple ways to do this. Since the game uses DirectX11 we can hook this and draw our own stuff. Another way is to initialize your own graphics api and render ontop of the game. This is the method I went with.
Overlay
For the overlay I decided to just go with ImGui. ImGui is a gui library for c++. My first approach to making an imgui overlay I did using DirectX11. Making the overlay went fine, but drawing was not as easy…
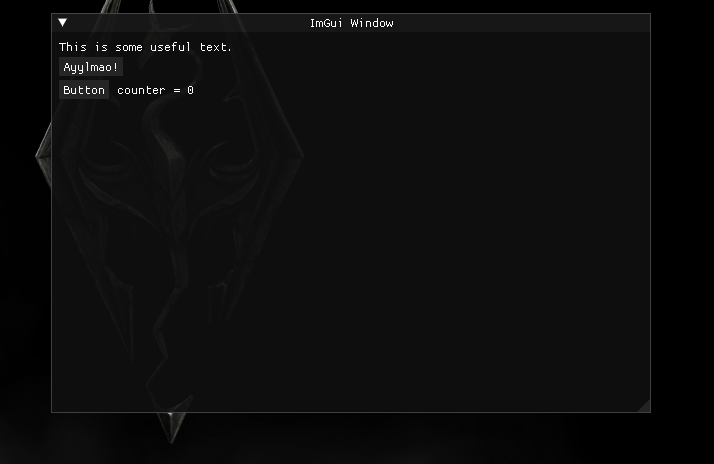
Since it’s an overlay it also has its own window.

I tried to make some wrapper functions for DirectX, but it kept crashing my graphics drivers making everything super unstable. Basically forcing me to restart my computer.
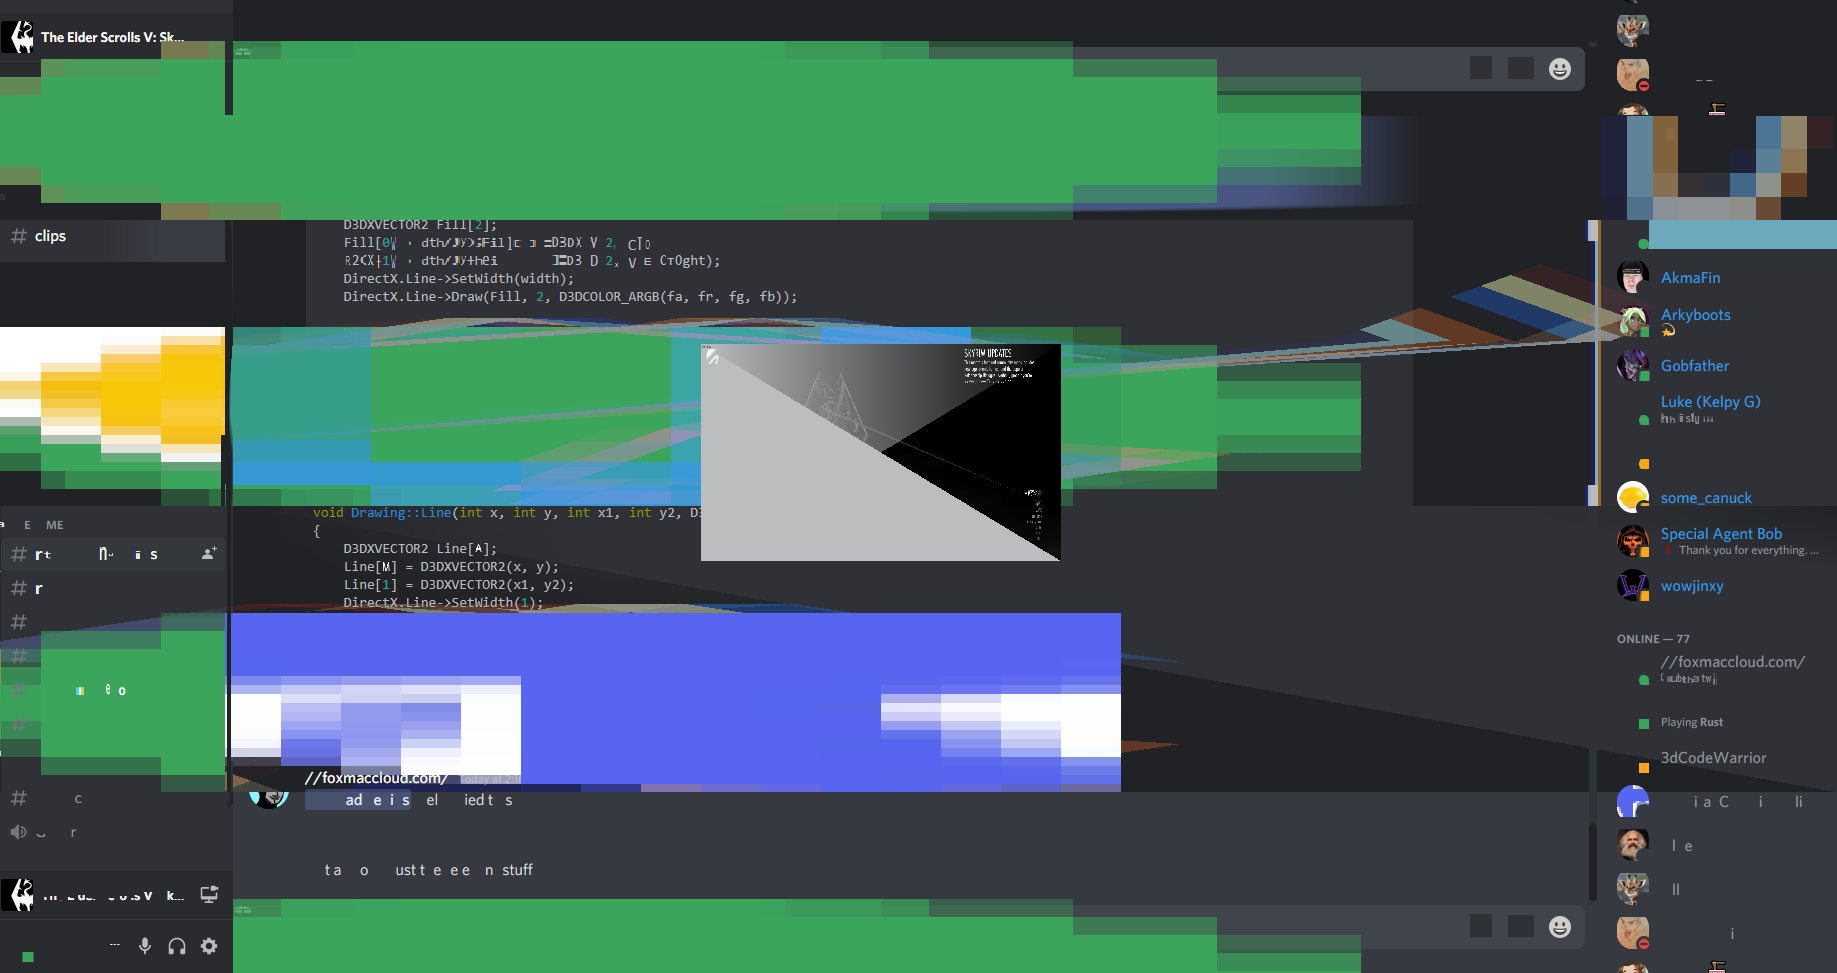
I then tried doing OpenGL3 which I had better luck with. The Cherno has some amazing guides on how to work with opengl which was a huge help when writing wrappers! Now that we have an overlay and some wrappers, I can start to draw. First I did was figure out how to draw a line, then use that line wrapper to draw a box. Not I just have to write the ESP!
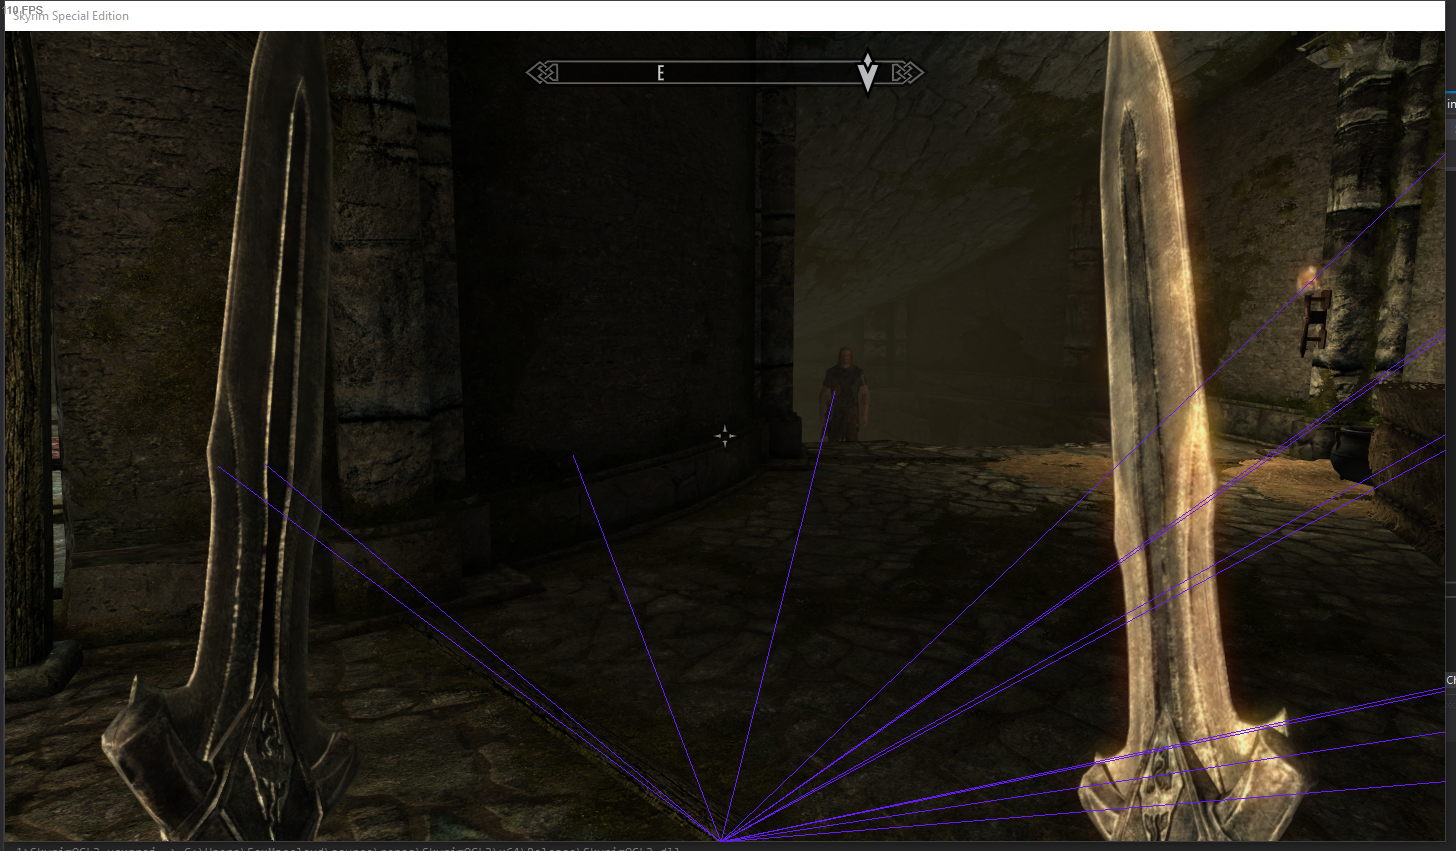
Writing the ESP
Writing the esp isn’t hard. We need a viewmatrix which you can find using the guide on guidedhacking, the entities locations, a world to screen function and something to draw on. Now that we have that, we can write our ESP fucntion. I’ll first do ESP lines because they are easy.
float VM[16];
void Cheats::ESPLines(bool run, int width, int height, float lineWidth, float r, float g, float b, float a)
{
	if (!initalized)
	{
		Cheats::initalize();
	}

	if (run)
	{
		memcpy(&VM, (PBYTE*)viewMatrix, sizeof(VM));

		for (int i = 0; i < entities.size(); i++)
		{
			if (entities.at(i) != nullptr)
			{
				vec2 vScreen;
				if (worldToScreen(entities.at(i)->xyz, vScreen, VM, width, height))
				{
						drawLine(width / 2, 0, vScreen.x, vScreen.y, lineWidth, r, g, b, a);
				}
			}
		}
	}
}
VM is our viewmatrix. Cheats::initalize(); just makes sure that we have our hook in place and gets our offsets etc. if (run) checks if our esp lines are toggled on or off. memcpy(&VM, (PBYTE*)viewMatrix, sizeof(VM)); copies the values from the games viewmatrix into our viewmatrix. if (entities.at(i) != nullptr) makes sure that the entity does exist. The rest translates our 3D positions to 2D so we can draw them on screen then draws it. This makes us some basic ESP lines.
I started writing this post early 2021 and it’s now mid 2022. In the meantime I have finished both this project and started working on more projects. At my university we can choose to have a “passion project”. In this project we can choose whatever course we want aslong as we can have a professor approve that project. I decided to choose game hacking as that project.
In this project I explored both Skyrim Special Edition and Final Fantasy XIV as games to hack. I also wrote a lot of prequisite knowledge for understanding which was mainly for my teachers to understand. Since this project basically makes this text redundant I suggest reading that pdf instead of this post. You can find the pdf and the source code related to the pdf here
c++ cpp re reverse engineering hacking games game cheat cheat engine
2818 Words
2021-09-01 18:19 +0100